Anonymizing a CV makes it easier to share and obtain unbiased opinions from managers and/or customers. Instructions for building a strong CV.
Would you like to be able to send an anonymous CV to a third party (manager, client...) for review? Find out how to anonymize your CV in Beetween
What's the point of "bulletproofing" a CV?
Blinding a CV is tantamount to making a CV anonymous: you hide all personal data on a CV, making it impossible to identify the person.
This feature is very useful for sending a CV without personal information (name, photo, contact details) to a client or manager to ask for their opinion on the candidate. In this way, only the professional background, training and skills described will be taken into account in the opinion, without prejudice of any kind.
Anonymize a CV in Beetween
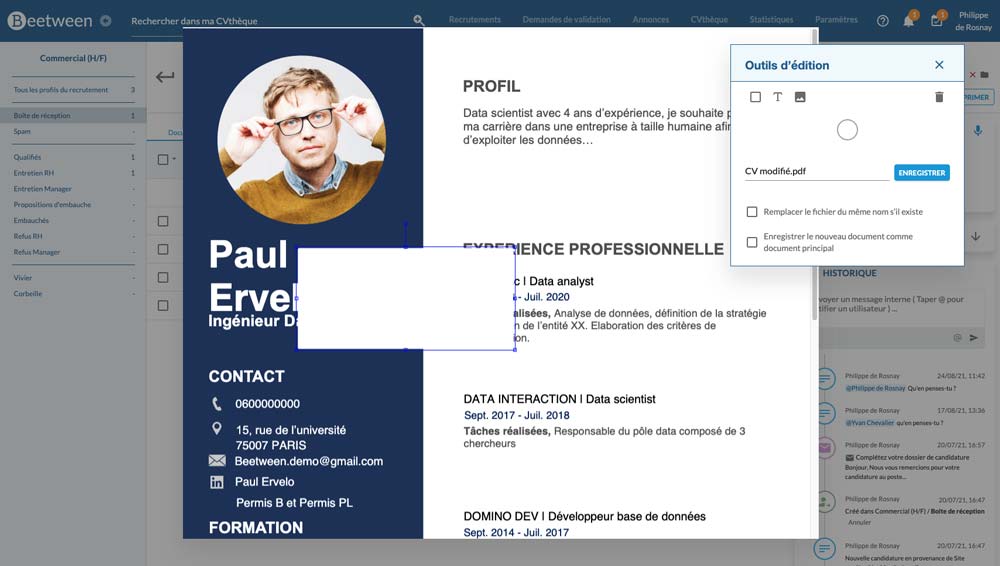
To shield a CV in Beetween, simply hide the identifying elements: photos, name, contact details.
Go to the documents section of the candidate's file. Locate the CV to be anonymized and click on the 3 dots at the end of the line to bring up the menu, then select Customize.
Your document will open, along with a panel of possible modifications in the top left-hand corner.
In the editing tools, click on the small white square and move (and resize) it to hide the desired information. You can resize the block and use as many white inserts as required.
📌 Good to know:
By default, the color insert is white, but you can change the color by clicking on the small white circle in the modification selection panel.
Use my logo to hide elements {option}
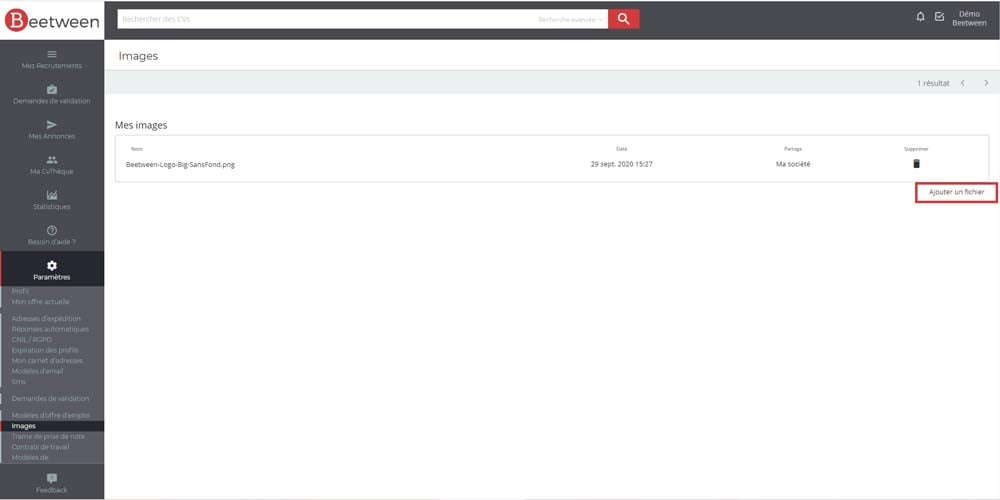
As an option, you can import images into your Beetween platform. To use your logo as a mask on a shielded CV, start by importing the image file into Beetween.
To do so, go to Settings & Images
Clicking on Add a file opens a file selection pop-up. You can only select one file at a time. There's no limit to the number of files you can store. Remember to name your files in an understandable way, so that you can reuse them later.
Then go to the candidate file to modify the CV. In the editing tools, you can now include a photo. Click on the Photo icon and select the image you wish to use. A thumbnail of the image appears, click on Add to confirm your choice.
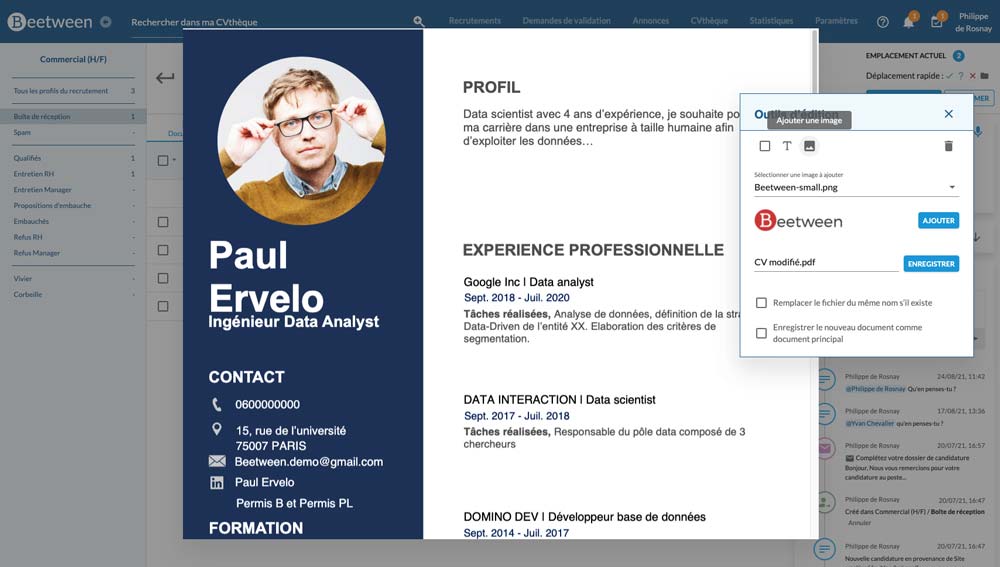
You can move and resize the image as you wish, and use colored inserts and text to complement it.
