Chapter 2 of our beginner's guide : Organize your 1st recruitment
Create a recruitment
When you log on to your Beetween platform, you're automatically taken to your recruitment dashboard.
In the blink of an eye, this dashboard will give you a complete overview of your current recruitment activities. We'll come back to this dashboard in the "Manage applications" chapter.
All candidates you wish to register in Beetween must be associated with a recruitment.
Creating a recruitment is simple. In the "Recruitments" page, click on "Create a recruitment". Enter the desired name and confirm. At this stage, you have the option of associating the file with a folder, either by selecting an existing folder or by creating a new one.
You can also select the agency you're recruiting for (if applicable) and choose the recruitment stages (by default, "Select all" is ticked, as this is the most frequent case).
🚀 Tips for use:
Enter a name that corresponds to the type of profile you're looking for or the type of position you're offering.
🎮 Practical example:
Let's create a new recruitment "Full Stack Developer", and place it in the in the new folder "Folder 2" :
📌 Good to know!
To make it easier to find your way around later, you can also set a priority level. The priority is set to 1 (the highest level) at the time of creation. To modify it, simply select the line and click on "Modify priority".
Your recruitment dashboard
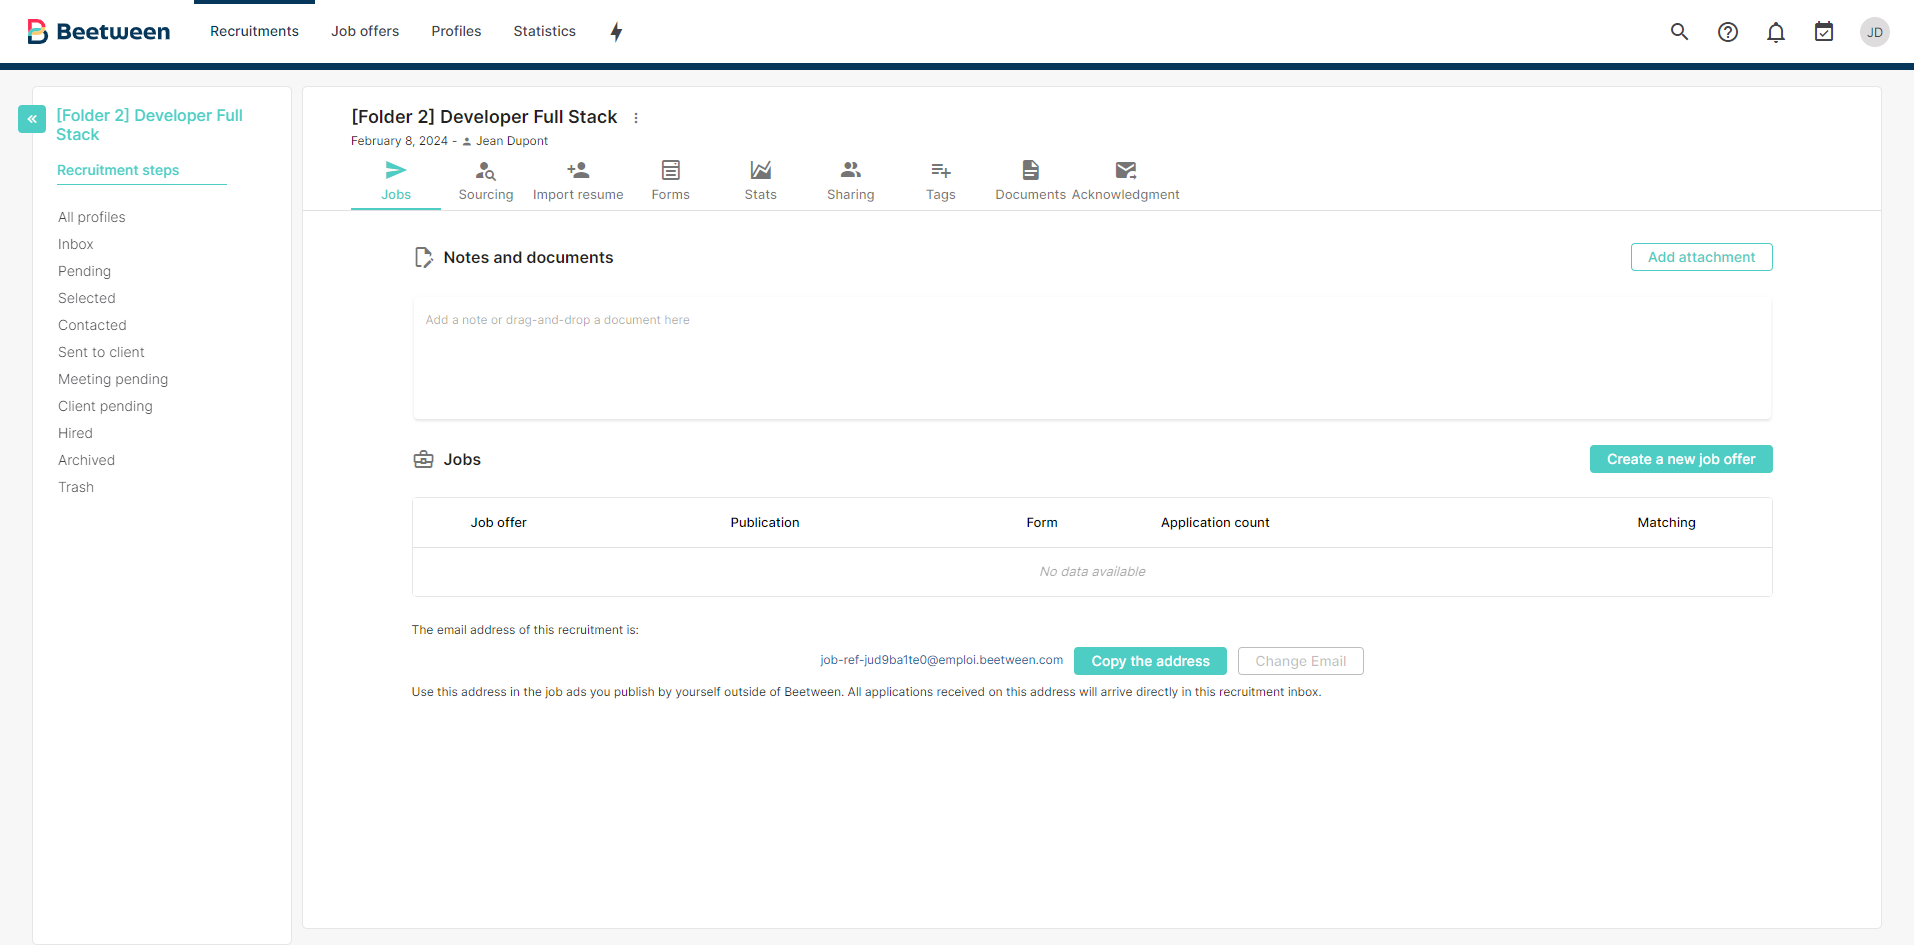
Once you've created your recruitment, you'll come to this page. Let's take a look at the possible actions:
- By clicking on the menu to the right of the title (name of your recruitment), you can rename the recruitment, change its folder, change its creation date (if you have the rights), archive it or restore it (if it was archived).
Please note, however, that archiving a recruitment will unpublish all related advertisements! In fact, archiving is tantamount to closing a recruitment.
By clicking on the flag to the left of the title (name of your recruitment), the stages of your recruitment are displayed. You can hide them again by clicking on the double arrow that appears in place of the flag. - Jobs: This is the default view, and the one we're currently on. It includes notes and documents, ads corresponding to the recruitment and the latter's e-mail address.
Notes and documents: Notes allow you to attach a description to the recruitment. You can also add documents. These features are particularly useful when working in collaborative mode.
Job offers: This section lists the job offers corresponding to the recruitment, along with their status and some of their characteristics. It also allows you to create an advert or search for candidates via sourcing, but we'll come back to this later. By clicking on the status of your offer ("Published", for example), you can access its publication report: we'll talk more about this in this article.
Recruitment e-mail address: If you publish an ad, this e-mail address will automatically be forwarded to the distribution sites, and will serve as the e-mail address for receiving applications. Having access to this e-mail address is very useful if you're setting up a career site yourself, or if it's your unsolicited application file. - Sourcing: This tab allows you to search for profiles for an ad in various CV libraries. We'll come back to sourcing in detail in other articles.
- Import CVs: This tab lets you simply drag and drop new candidates into Beetween. We'll look at the different ways of importing candidates in the "Organizing your CV library" chapter.
- Questionnaire: As this feature requires Premium configuration, and is only available in the Gold package, we won't go into detail here.
- Statistics: These will enable you to manage your future recruitment by studying the hires you've made and, above all, the main sources of your candidates (response to an advertisement, via which distribution site, unsolicited application...).
- Sharing: With Beetween, you can work collaboratively, sharing your recruitments with a third party or parties. Click on the button with the "+" (New share), enter the type of share (to a User or Group), the e-mail address of the user or group of users, if applicable, and choose the rights of the user(s): Owner, Administrator, Stakeholder or Read-only.
- Tags: The "Tags" tab of a recruitment allows you to add a value associated with a tag to all applications arriving in this recruitment folder.
- Documents : This tab contains the various documents related to recruitment.
- Acknowledgement of receipt: This tab allows you to view, edit, activate/deactivate (if you have the rights) or test the e-mails that candidates will receive when they apply for an advert, whether published, expired or including a questionnaire.
Collaborative work
If you recruit collaboratively, it's best to give access to the recruitment concerned to all parties involved in the selection and hiring decision. This will enable you to centralize all information relating to the candidate.
The different powers
When you share a recruitment, you can choose between different levels of power:
- Administrator: power to modify and delete the entire recruitment and its contents.
- Stakeholder: power to modify advertisements and candidate files contained in recruitment.
- Read-only: power to consult only the advertisements and candidate files contained in the recruitment.
2 possible cases:
- The e-mail address is that of another Beetween user: the candidates present in the recruitment will also be visible in the CV library of this other user.
-
The e-mail address is unknown to Beetween: the platform will inform you of this and suggest that you register him/her as a free user. His or her possibilities will then be more limited, but he or she will still be able to modify candidate files (documents, notes, etc.) if you have given him or her at least " Stakeholder " rights.
To find out more...
👉 Best practice #1: Create a separate folder for unsolicited applications
Do you have a spontaneous application form on your website? You might as well receive applications directly in Beetween!
To do this, go to "Recruitment" and click on the "Create a recruitment" button. Give it a name and confirm.
There are several advantages to separate recruitment:
- By using the e-mail address in the recruitment folder, you can receive candidate files directly in Beetween.
- You'll have access to statistics on unsolicited applications.
Would you like the source of these unsolicited applications to be correctly named?
Let's imagine that the e-mail address of the recruitment folder is job-ref-neg1s0biy9@emploi.beetween.com :
- With acknowledgement of receipt:
If you add the code 80 before the @ (job-ref-neg1s0biy980@emploi.beetween.com), incoming applications will be received as having "Unsolicited application" as their source, and your application acknowledgement e-mail will be automatically sent to applicants. - No acknowledgement of receipt sent:
If you add the code 81 before the @ (job-ref-neg1s0biy981@emploi.beetween.com), incoming applications will be received as "Unsolicited application", and no acknowledgement e-mail will be sent automatically. You can send one afterwards, if you wish.
👉 Best practice #2: Create recruitment file folders
You can create folders to organize your recruitments by type, as described in the first example.
Once a recruitment file has been associated with a folder, you can always modify it by selecting its checkbox and choosing "Change folder" from the options then displayed. This action also allows you to create a new folder.
🎮 Practical example:
We want to move our "Full Stack Developer" recruitment file to the "File 1" folder:
⬅️ 1st step #1: Introduction to Beetween | 1st steps #3: Organize your CV library ➡️